As there are a lot of cables to connect and also the battery leads to bolt on we spent an evening dedicated to this. Firstly we went through the manual, only to discover it only describes only 2 or three of wires actually there, which was of little help as these were evidently for an old loom with different coloured connections. We then progressed onto several others blogs to try and get a picture as to where half of them go.
Alternator and starter motor wiring.
As I wasn't under the car doing the wiring, only; giving moral support taking photos, taking the mick out of dad, and later measuring up cooling hoses; I Actually have no idea what he decided was possibly the right wiring. However we still do not know whether any of these connections are right so we'll have to ask derrick and do some more research.
Earth strap from chassis (bolt in engine mounting) to alternator mount. Also sprayed anti corrosion spray into all connections.
Oil Temperature Sensor Connection.
Couldn't find a home for these... as are a few others they may be unused, but we will double check with Derrick.
First off we decided to fill the gearbox before sticking the engine in as we aren't concerned with weight due to the two ton lifting capacity of the engine hoist. However, first problem of the day:
We do not have a 3/8" Allen key.
Second problem:
We have only been supplied with 1Ltr of gearbox oil and 1Ltr of Diff oil.
So, off to B&Q for a cheap imperial Allen key set and the local car shop for some more GL-4. However when it came to buying more oil the shop didnt have any GL-4 in stock, so we improvised and went for some GL-5 instead, as the manual and owners manual both state that both are suitable in their gearboxes. After my dad did some research after we finished tonight it turns out that previous owners have pondered the same but have been told by Caterham, when asked, that only the GL-4 is suitable and the manual and the handbook would be updated... (or not)
In light of this we have come to the conclusion that it will not do any damage and we will be changing all the oil after the 500 mile run in anyway.
Much easier before it's in... Gearbox levelled off and filled until dripping out the hole.
Rubber foot attached before lowering in.
Engine In
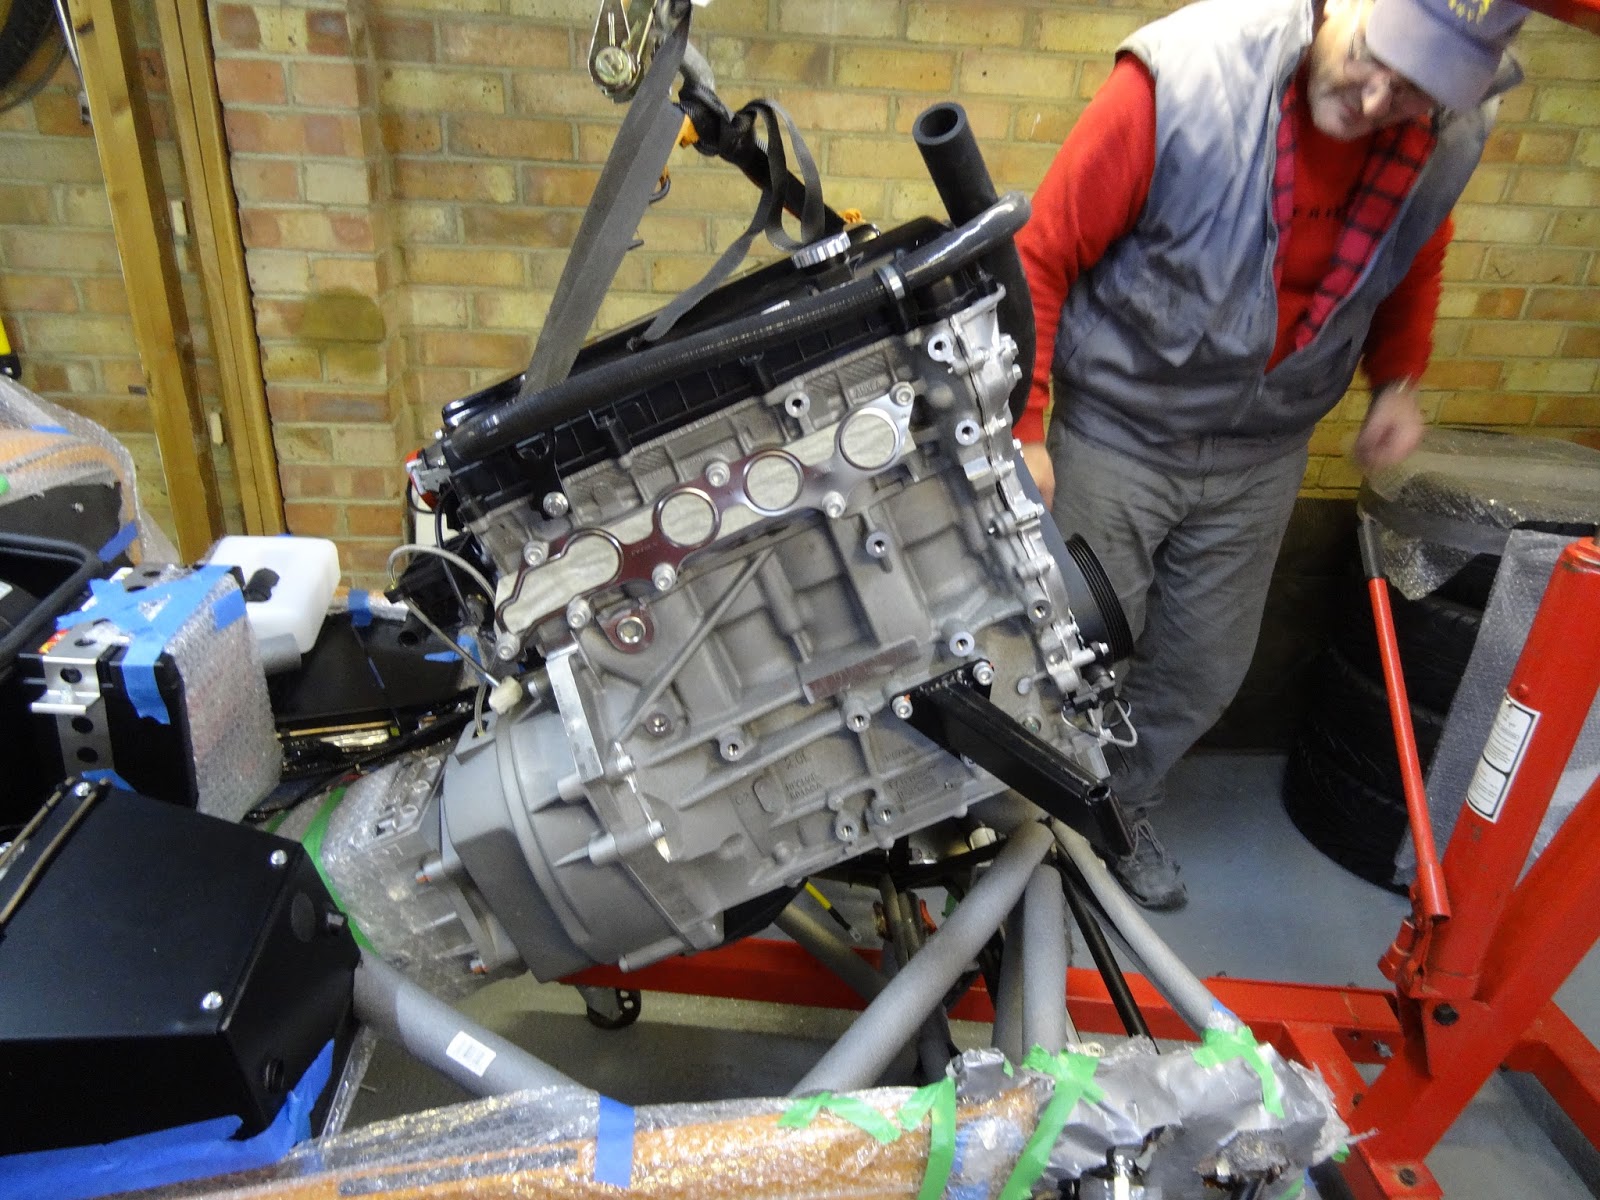
First we dragged the engine on the pallet over to the front of the car and aligned it with the hoist. After creating a strop and adjusting the lengths to roughly get a 40 degree angle on the engine, we bubble wrapped the gearbox to protect the chassis tubes while trying to fit such an immense engine and gearbox into such a small space. Also, as instructed, the long "L" shaped hose onto the back of the engine, a bit fiddly as the 40mm jubilee clip is not big enough to slide on while it has bitten. We remedied this by clamping it with some pipe grips then tightening with the driver.
Wrapping the gearbox.
Unease as it is slowly lifted.
At this point we were still optimistic about it being able to fit without any engine modification. Beforehand we also added extra protection along the engine bay and around the tunnel to protect the heat shielding and chassis tubes.
The manual states to remove alternator, remove starter motor, and fit the long "L" shaped hose. Our advise (for Duratec engines on SV model at least) is to NOT fit the hose as it interferes with the wiring loom; do NOT remove starter motor; REMOVE alternator; REMOVE right hand engine mount. The alternator is easier than some might think, as there is a self tensioning pulley at the top, and two bolts top and bottom of the alternator.
In the end we admitted defeat and raised the engine slightly to modify things. Alternator unbolted and cable tied to plenum chamber.
Much easier now without mount and hose.
Once the gearbox was nearly in position we put the trolley jack under the car to lift the gearbox and also allowing for a higher and further pivot point, allowing for the engine to lower and not the gearbox.
Trolley jack under rubber foot. We had previously packed the cup on the jack with layers of silicone to protect the paint on the chassis.
Once the gearbox foot aligned with the bolt holes for the bracket we loosely bolted it in place so we could get the jack out of the way and fully align the engine mounts.
Lowering Gearbox onto bracket.
Once the foot was in place we lowered the engine into position over the rubber engine mounts we reattached the RH engine mount bracket and through bolted them in place.
Engine roughly in place with L hose back in place (albeit the wrong place, which only emphasises the point of, "why the hell are we asked to put it in beforehand").
Mount re torqued to block.
Possibly overkill for the hoist, but very handy.
Touching on RH side of bellhousing and LH starter motor. These both do not allow for any more adjustment either way without damaging the heat shielding. Will ask Derek for advise as to how they align the engine.
Bracket and foot torqued. Foot to bracket bolts left for later when adjusting alignment.
View down the underside to finish the night. Also we had to lower the front off of our handmade rolling axle stands due to the stands being too wide to fit the hoist around it and too low to fit the hoist under it.