Tuesday, 19 January 2016

Build Day 42- IVA Trim, Handbrake Cable, Steering Clamp, and Lambda Probe

Day 42- IVA Trim, Handbrake Cable, Steering Clamp, and Lambda Probe


IVA Trim   


Covers on uprights, also on steering rod ends. (The one over the bolt connecting the steering arm to the upright was removed by Caterham during the PBI, however may put another back on)

Cap on head but not nut, of the front upper wishbone mount.

Cap on bobbin and on bracket top.
(Also on PBI Caterham fitted some scuttle trim onto the front of the cat heat shield.)

Handbrake Cable 

We have now finished fitting the P clips to the chassis and handbrake cable as many others have done. We do feel however that it runs a little close to the drive shafts, however this is the best we can get it. 
During the PBI Caterham have removed the P clips, and cable tied it to the "A" frame, which somehow takes it slightly further off of the top of the drive shafts. 

Routing of the handbrake cable.

Steering Clamp 

We have noticed, when re-reading other peoples blogs that the chamfered side of the small side of the steering clamp should face the shaft and not outward as seems most appropriate.

Tightened and torqued.

Lambda Probe 


We have now decided where we wish to run the lambda probe wiring along the body and to the connector. We used adhesive cable tie bases to hold the cable tight to the body, then ran it up the end of foot well, then along the top, being fixed in certain places. We have decided upon this so as to reduce the possibility of cable damage by stones etc. as it runs at one of the lowest points on the car.

Cable tie base on inside of chassis.

Cable running from possibly destroyed cat and up the foot well.
This was later removed by Caterham and relocated along the underside of the car, then up the tunnel, under the battery.

Sunday, 17 January 2016

Build Day 41- First Start Up

Day 41- First Start Up


Start Up Prep   


Before we can start the engine it needs filling with coolant and oil. After our research we have decided to run in the engine using mineral running in oil, and thus have decided to go for Millers CRO 10w40 Running in mineral oil. Initially we put in the 6trs the manual says to put in for starting. Also before starting we turned the engine over to circulate the oil properly. (http://www.millersoils.co.uk/automotive/tds-automotive.asp?prodsegmentID=187&sector=Motorsport)


Letting the bottle drain. Not a drop seems to come into the tank, evidently it requires turning over to circulate the oil.

Running in oil.

We then filled the cooler bottle, and the radiator through the top plug, with a 50/50 mix of de-ionised water and the supplied coolant. This was only filled to the minimum fill line then topped up as required. Finally we filled the petrol tank with roughly 15ltrs of petrol.


Be very careful, over fills very quickly.

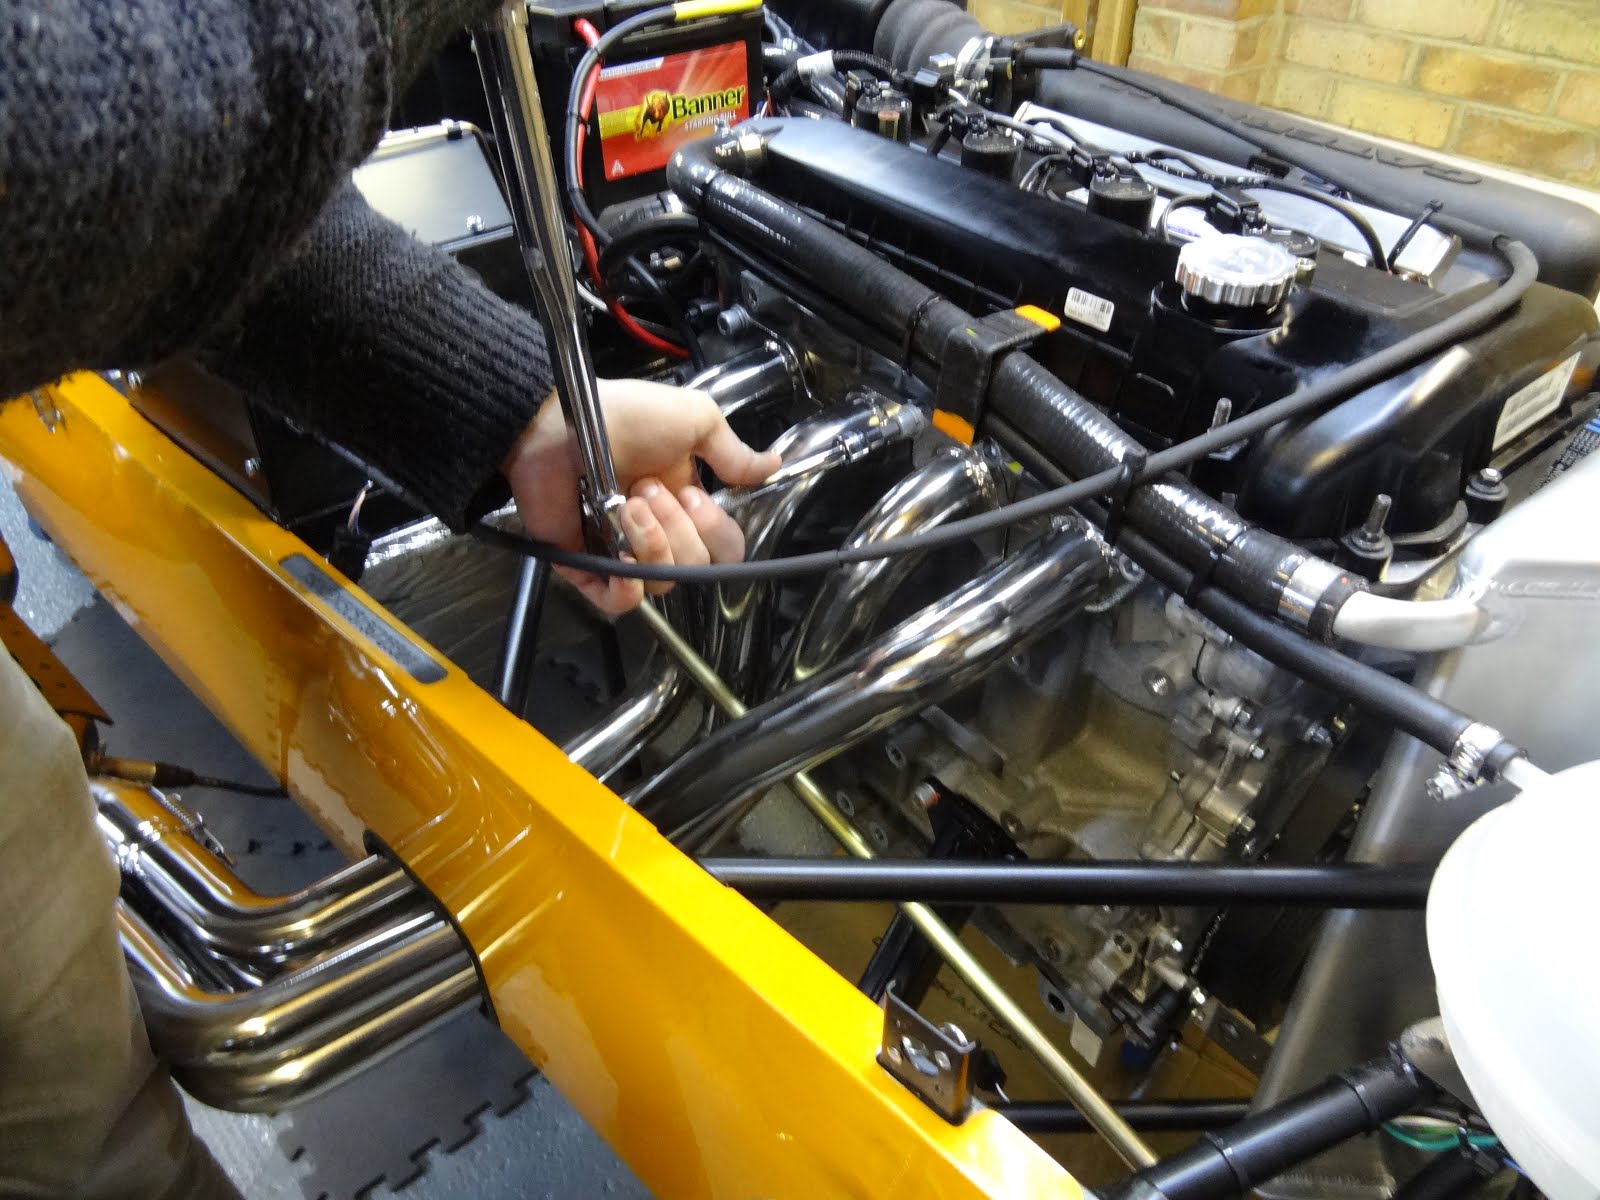
Before putting the car on the floor we gave the exhaust bolts a quick torque, put the wheels on, then dug out the keys.

Primaries looking great with the wrapping off.

Certainly an unexpected surprise unveiling these when the car arrived.

Car rolled out ready to go.


Start Up


As instructed we initially disconnected the fuel inertia cut off switch on the bulkhead, then proceeded to turn over the engine for 30 seconds in order to circulate oil and coolant, and to get to 4+ Bar of oil pressure. Then we reconnected the switch, primed the fuel line with the ignition, then started the engine. This started straight away, however, as the idle hasn't been set yet the engine requires some revs in order to not cut out. We kept the engine at 2000 revs for a few minutes to allow for proper bedding of the heads.

This process quickly stopped however as we noticed that the catalytic converter had become cherry red and only two of the primaries were discolouring. After this we decided to allow the cat to cool, then we wheeled the car back in and not do anything more until we have talked to Caterham.

Only primary 1 & 3 being heated. Evidently not firing on all cylinders.

We have made a guess that the two misfiring cylinders are dumping fuel into the catalytic converter, which was burning from the exhaust gasses, thus heating the cat and eventually spitting flames out the exhaust.

Each of the light specks is a small blister where the heat was starting to damage the shield.

While the cat was cooling we decided to put the adhesive foam strips, supposed to be fore the cycle wing fitment for the protection of the paint under the bonnet. This is only going to be a temporary matter until we get some different foam.

Foam along front edge and underside.

Friday, 15 January 2016

Build Day 40- Exhaust, Battery, Steering, and Wipers

Day 40- Exhaust, Battery, Steering, and Wipers


Catalytic Converter   


To finish off the exhaust system I fitted the cat heat shield, and dad fitted the lambda probe. The heat shield went on simply enough, just thread the two jubilee clips through the shield brackets and slide over the cat, then tighten with the heads on the inside of the cat. The lambda probe simply screws in and connects to the wiring loom. In order to protect the wiring we wrapped the head and the first few cm of the wiring with self amalgamating tape. We have the wiring routed up the front of the foot box and then along the front of the pedal box to the connector.


Clips threaded through shield.


Polished cat with springs and band clamp on.

Shield on.

Lambda probe in and wrapped.

Battery


Quickly connected the battery leads after giving them a quick clean, then managed to break both of the very brittle terminal covers. We just used some glue to fix the top and cut come slots out to allow the leads out.

Leads connected.

Cables tidied and covers fixed and on.

When the battery was fully connected we tested all of the electrics, apart from the engine, and everything works so far!! Fingers crossed that the engine start goes without a hitch.

Wiper Blades


As the blades have smaller than a 3mm radius on the ends of them they require to be filed down to comply to the IVA test. I did this with a small hand file, then painted the ends with some black Hamerite metal paint after I had cleaned them.

Blade ends.

Steering

Started by attaching the steering wheel, then the universal joint. However first we had to make a better assessment of the steering, as at the moment they are a few degrees toed out, despite having 13 turns on each rod end, so turned each one in, on turn at a time, until they were straight, then did it one more turn on each end. Then we reattached the track rod ends to the uprights, put the rack central, then attached the universal joint to the steering column. 


Wish the pad wasn't required, the wheel looks much better without it.


Steering universal joint, as straight as possible.


Thursday, 14 January 2016

Build Day 39- Exhaust

Day 39- Exhaust


Fitting Exhaust   


To really set the car off we decided to get the primaries, cat, and silencer sent off and professionally polished. We called round a few places and eventually got a decent quote from Mark Feltham, from Mark's Mirror Polishing, based in Peterborough, specialising is small scale polishing of car and motorcycle parts. Took them up on the Tuesday and picked them up the following day. They look fantastic. We had asked for the whole set to be race polished, but he decided to go half way between race and mirror polish for the Primaries and silencer, and the y look even better than imagined!!!!


One of the pics we sent Mark for the quote.


Beforehand I had done a fair bit of work cleaning the primaries and silencer with wet and dry paper in order to clean the weld marks and remove embedded grease. 


Our polished pipes.

This is the picture Mark sent before we picked them up. There are now other pictures on his website (marksmirrorpolishing.uk/mmp-gallery/) and I'll try and take some better pictures of them on the car.

To fit the pipes the instructions turned out to be useless, apart from the fitting order, because we had removed the labels from the ends. However they are pretty simple to fit with two sets of hands, mainly as the front and rear primaries have special ends which only fit to the block one way, and the middle two only go in one way too. 

Primaries in, car wrapped again in bubble wrap just in case.

Cleaning the bracket mount with a tap.

Cat required a few taps with a mallet to get it seated enough to get the spring clamps on.

As others have done, two cable ties around the springs.

For the silencer bracket we cut a small piece of rubber from some excess wing trim, and put it in-between the bracket and the body, which was then tightened appropriately. Then the exhaust bobbin was inserted into the bracket and tightened before the silencer was added, ensuring that the band clamp was put on before the silencer was put on.

All together, just the band clamp, cat heat shield, and the IVA trim.

A touch of exhaust sealant joining the cat and pipes.

Tuesday, 12 January 2016

Build Day 38- Boot Cover Prep and Headlight Wiring

Day 38- Boot Cover Prep and Headlight Wiring


Boot Cover Prep   

As Caterham have offered to replace and re-fit another rear bulkhead interior carpet we can't fully fit the boot cover, however we can at least do some of the fitting. The first job required removing the metal band from the forward edge of the cover. This required unpicking the stitching at one end and sliding it out.

Unpicking the stitching.

Once the strip was removed we could mark the positions of the harness bolts, then we used our punch set to cut holes for them. At this point we marked the popper base points along the top of seat bulkhead. We marked and drilled 3mm (7/64" = 2.8mm) holes 1 1/4" either side of the centreline, then one half way between each harness shoulder strap. Then decided to leave the rest of the attachment until after the post build inspection when we can do a proper job. After this we reattached the trim of the boot cover with impact adhesive.

Sticking the underside down. The top was most undamaged when we unpicked the stitching.


Headlight Wiring

Just a little bit of tidying and connecting before the cars goes off. We attached the wing repeater wiring into the connector block, then earthed the LHS repeater with a ring to the brake union t piece, and the RHS repeater earth was earthed in unison with the headlight earth in the connector block. We then tidied the RHS connector block under the expansion bottle bracket and the LHS connector block to the chassis tube under the top radiator hose.

RHS earthing of repeater piggybacked onto headlight earth.

RHS headlight connection tidied under bracket.

Monday, 11 January 2016

Build Day 37- Wing Mirrors, Boot Carpet, Washer Nozzle, and Fuel Filler Shroud

Day 37- Wing Mirrors, Boot Carpet, and Washer Nozzle


To start the evening we finished the brake bleeding as more brake fluid had arrived. As I was already in the car I decided to fit the wing mirrors we had constructed before bleeding the brakes, and fit the washer hose to the nozzle in the scuttle.

Wing Mirrors  


The mirrors have to be first de-constructed from the side screen mount then reattached to the IVA stalks. This is tricky as it requires a few pairs of hands, one to screw the mirror ball mount through the stalk and the other to hold the ball joint in place with needle nose pliers, otherwise the joint just rotates in the mirror body.

IVA wing mirror parts.

Fitting in place with washer in place to protect the paint.

Then the windscreen screws must be removed and replaced with the stalk fittings. The card washer is fitted over the fitting then the stalks were tightened to the windscreen, with the grub screw in the stalk.

Mirror in place.

Washer Nozzle  

Before getting out of the car I fitted the nozzle to the scuttle which is kept in place with a plastic nut. The hose was then cut to length, pushed over the nozzle end, then the hose  was strapped to the back of the wiring loom.

Underside of the nozzle.


Hose tidied out of sight.

Boot Carpet  


We finished by putting the three remaining boot carpets in, all using Velcro strips so we would later have access to the wing bolts. This ended up taking quite a while trying to force the bottom edges around the bottom edge of the floor panel, which we had up in order to make the job easier. After fitting the corner carpets we just placed the floor piece in and left it to settle in the bottom until later on. We then quickly noticed that the fuel filler shroud was wrong, however this was not surprising as the the label on the bag said SV fuel filler shroud.

Carpet in.


Shorter shroud.


Sunday, 10 January 2016

Build Day 36- Rear Lights and Wing Repeaters

Day 36- Rear Lights and Wing Repeaters


Rear Light  


Very simple to fit and went on in no time at all. We started by ensuring that the lights were the right way round, so as instructed the double filament bulb is on the inboard side and the single filament bulb is on the outside with the amber filter. Then after cleaning out the pre-drilled hole with a 4mm drill bit, we lightly held in the light with a self tapping screw and then aligned the box. We did this with a spirit level on top of the fog and reverse light then drilled the other three holes into the wing. Before screwing the lights on we gave the lights and wing a thorough vacuum.

We don't feel our garage floor is particularly flat so we have related them to the other lights already done by Caterham.

Drilling holes. Tape barely stays stuck to the film, but is possibly a tad too strong for the paint alone.

Grommet through the hole, which is then fitted in the aluminium body panel.


All on. The process if much easier with the floor up as the space between the fuel tank and the body is pretty tight.

Wing Repeaters


Previously we had cut the wires off of the repeater to then later join light to the wires. The light does eventually lie flat to the wing but it does have to be quite tight, probably depends where the holes are drilled for it. We ducted the wires along the rear of the upper wishbones and through the underside of the bracket. This was then secured to the wishbone with cable ties.

Tie heads hidden under wishbone.

Look pretty good on, can see why people go for the clear covers though, however the car is orange so it doesn't matter in the slightest to me.